Monday, August 30, 2021

Succulents

My latest plant obsession: succulents. 

I'm forever intrigued by the variety, and I'm easily sucked in by the adorable, tiny $2 baby-plants-in-pots that I see at the store. I have to buy them and bring them home and re-pot them into arrangements.


Every now and then, I find a giant plant on clearance; sometimes I discover a variety I haven't seen before.


Always, the possibilities are endless!


I put this arrangement together, and it's enjoying the outdoors; I love that it's blooming!


I recently found out that some herbs (such as rosemary, sage, thyme) like to be in pots with succulents, since they have similar sun and water needs. What luck -- I happen to have some rosemary, sage, and thyme! Must try!


I pretty much have no idea what I'm doing with these, but I'm having a lot of fun anyway, and, for the most part, they're not dying, so -- something's working!

Thursday, August 26, 2021

How I Painted My Metal Front Door

Three years ago, I painted my metal front door. Since I'm so satisfied with the results, even all this time later, I'm blogging about it. My usual blog topics are a lot more centered around fiber-crafts, but in the spirit of sharing creative ideas, this one's pretty practical.

When I wanted to paint my front door, I couldn't find any tutorials or DIY explanations online that related to my kind of front door. So, when I worked on the project, I took pictures, hoping to blog about it some day. And then I waited a while, so I could give honest suggestions, knowing that it had worked AND lasted. 

My metal front door had a wood-grain-look finish on it, and the finish was slowly bubbling up and flaking off. This door had been facing the unrelenting afternoon sun for nearly two decades, so I wasn't surprised. But I was disturbed to find that little chunks of wood-look would disappear and would reveal the dark, shiny metal of the door. 

When I wanted to start the project, I did what any modern DIY-er does: searched the internet. For some reason, on this topic the internet was surprisingly unhelpful. Nobody seemed to be talking about what to do about repairing textured finishes.

Since I didn't find any online how-to help for my exact project, I pieced together the useful ideas I found, and I just gave it a try. I'm sharing my project here, in case anyone else is looking for advice on how to paint a metal front door.

Here's another close-up of the "before" look on one of the panels of the door. The finish layer was bubbling, cracking, and flaking off. Even when I tried to touch-up paint the bare spots, there was an obvious texture problem.


I wanted to find a way get the door back to looking good, but I didn't have a way to repair or replace the wood-grain finish. The white stuff felt like it was a thin layer of brittle vinyl or plastic, so when it flaked off, not only did it show the dark metal beneath, but it also left a void in the door's texture.

I started by scraping the flaking finish. I used a basic putty knife for most of the work. I didn't use any chemical remover solutions, because the plain scraper was pretty effective.


Some of the finish flaked off immediately; some of it required more work. At the very edges, sections of the finish wouldn't come off at all, so I just sanded those spots as smooth as possible.


Here's what the door looked like after I scraped off what I could and after I sanded the very edges a little smoother. Here's the mostly-scraped upper part of the door:


Afterward, I moved on to putting primer on the door. 

Zinsser 1-2-3 primer is my favorite. It's an indoor-outdoor primer that works on a variety of surfaces, including metal. It's also water-based, which makes cleanup easier.  

Just for the record, my favorite drop cloths for jobs like this are cheap shower curtains, the kind you can buy for a dollar or two at your favorite dollar store or one-stop-shopping store.


I decided not to remove the doorknobs or hinges or anything, mostly because I needed the front door to be functional during the several days that I was working on the door. So, I taped around the doorknobs and hinges with painter's tape and just tried to be careful. 

I found that multiple coats of primer is a good idea, and that's what I recommend on a project like this: at least two coats of primer. The first coat of primer tends to look a little thin on bare metal, and on any dark surface, you need good coverage; giving it a second coat of primer provides the needed additional protection and coverage. Even if you have to paint on three coats of primer to get good coverage, it's worth it, especially since primer is usually cheaper than paint.


I just decided to use a regular paintbrush, not a roller or a foam brush. I tried to keep my brushstrokes going up-and-down on the long panel parts of the door, and I tried to keep my brushstrokes going side to side on the top, middle, and bottom "crosspieces" of the door. Even with the primer, I paid attention to keeping the brushstrokes neat, since the brushstrokes provide a bit of texture that might be visible.


Even though the internet DIY-ers didn't seem to have advice for my specific type of front door finish, it did seem like everybody had a favorite kind of paint. The one everybody kept taking about is Glidden Door & Trim paint. 

I bought a quart, and I got it from Walmart. Since I was only painting the outside-side of one door, one quart was way more than plenty. Again, it's a latex paint, so, easy clean-up, and I got the one that's high-gloss.

Word to the wise: if you're using this on an exterior door, double-check to make sure that the paint you buy says "exterior" or "interior/exterior" ... because I was surprised to find that interior-only door and trim paints look almost the same.


I was really happy with the very glossy, shiny finish of the paint, and I put on two or three coats of this paint. Obviously, this project spanned multiple days to allow dry-time between coats, but it was so worth it to get the front door looking so shiny and new.


So, if you happen to have a metal front door with a flaking finish, I hope you'll be encouraged that you can paint it and get it looking amazing again. 

I've been so pleased that this door has held up for three solid years, even facing the unrelenting afternoon sunshine. And after all this time, I've only found one single tiny chip in the paint, and that was easily fixed with a dot of the same paint.


Interestingly, the inside-facing side of the door has the same wood-look finish. But, not being exposed to the weather, it wasn't worn or damaged at all. So I left the inside-facing side of the door alone and didn't do anything to it.

Later on -- this year, in fact, I decided to paint our house number on the door. I had bought a can of the same Glidden paint in high-gloss black for another project. (The other project was that I painted my mailbox ... maybe I'll blog about that one of these days.) 

So it was the perfect thing to use to paint numbers on the door. (If I were to use another brand or kind of paint, I would worry about the two kinds of paint interacting badly with each other. The matching paint in another color was the perfect thing.)

So, now you know. I painted my metal front door. Even though it had a textured finish that was worn out. I love the new look, and I've been really happy with the results. 

Monday, August 23, 2021

Yarn Crochet ... With a Purpose

Over the years, I've done a lot of crocheting ... everything from fine-thread doilies to worsted-yarn afghans. I'm pretty sure my first real crochet projects were made from granny squares, which explains why I can almost crochet granny squares with my eyes closed! 

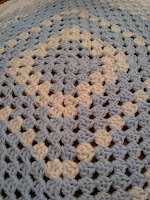
 Susana Neiger charity crochet: Blue-White Granny Square Susana Neiger charity crochet: Brown-Green-Blue Granny Square

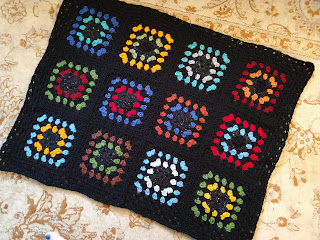
Susana Neiger charity crochet: Black & Colorful Granny Square

For a few years, I didn't crochet much at all. For a while, during my craft-y time, if I wasn't quilting, I was probably knitting socks. But that changed and my love for crochet was re-ignited when I had the chance to join a group of ladies at my Church to crochet things to donate to mission projects. 

Susana Neiger charity crochet: Bright Orange Hat Susana Neiger charity crochet: Gray-Variegated Hat

Joining in on the group's projects reminded me how much I love crochet, and how satisfying it is! The group projects mostly involve simple hats, small afghans, and baby gifts. 

Susana Neiger charity crochet: Brown-Rainbow-Striped Hat Susana Neiger charity crochet: Beige-Variegated Seaman's Cap

We donate hats by the hundreds to be given in the winter to workers on cruise ships and barges at our nearest major seaport. The hat-gifts are part of a bigger ministry that provides various services to these workers who arrive at the port from around the world and are soon on their way again. The hats are super simple to make, since they're designed to be the kind of thing a person could wear under their regular rain-gear/uniform. It's a simple gift, but might bring a little warmth, colorfulness, and cheer to a stranger. 

Susana Neiger charity crochet: Orange-Striped Seaman's Hat Susana Neiger charity crochet: Beige-Blue-Striped Hat

Our group is making small afghans which we donate in a variety of ways, including disaster relief projects, nursing home gifts, and things like that. I've had fun making small afghans to test out new patterns, to use up scrap yarn, and to create a finished product in almost no time. And giving it to a great cause makes the process even better!

Susana Neiger charity crochet: Pink Houndstooth Afghan Susana Neiger charity crochet: Brown-Fall Circle Granny Afghan

Susana Neiger charity crochet: Green-Fall Granny Stripe Afghan

For the past few years, our group has partnered with a local organization that provides baby gifts for young families in our community. Cute baby "cocoons" with matching baby hats has been the project our group makes for this organization, and they're fun to make and really adorable.

Susana Neiger charity crochet: Pastel Baby Cocoon Susana Neiger charity crochet: Pale Green Baby Cocoon

Susana Neiger charity crochet: Blue Baby Cocoon

Although it's not an official group project, some of the ladies in the group have also made and donated baby blankets to send to a ministry in Haiti that's supported by local friends. I've enjoyed the chance to crochet some cute things with baby yarn, knowing that some cozy crochet might just remind some moms and babies that they are loved. 

Susana Neiger charity crochet: Blue-White Granny Stripe Afghan Susana Neiger charity crochet: Pink-White Baby Afghan

Susana Neiger charity crochet: Pastel-Green Baby Afghan Susana Neiger charity crochet: Blue Wave Baby Afghan

I think making things and giving them away -- even to strangers -- is a wonderful way to put our talents to good use. I love to hear about the community projects that other crafters are working on, so I thought I'd share a few of mine on my blog, too.

Susana Neiger charity crochet: Pink-White Circle Granny Afghan

Related Posts Plugin for WordPress, Blogger...