Lately, I've had a lot of fun with "snowball corners".
For some reason (or no reason?), I don't usually do them the normal way (with four triangles) ... but they look good with only a corner or two ... In my Shirts Quilt Top, the "plain blocks" (between the nine-patches) have two snowball corners each; in the Boys' Window Quilt, I've got blocks with just one snowball corner each.
Here's a quick pictorial how-to on the snowball corners...
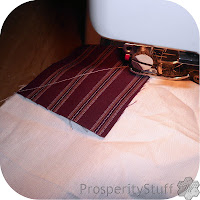
Instead of cutting and sewing a triangle to each corner, I like to use a small square, and sew it to the corner of the main block.
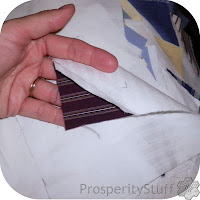
Then turn the "corner" back on itself and press.
Flip the piece over, and, looking at the piece from the back, see if the new corner sticks out past the main block piece. If necessary, trim the new corner even with the main block. (Front view below left, then back views, and a final view from the front.)
Then, it's time to trim a couple of layers off the back of the new corner. The bottom-right picture is the back of the block after trimming ...
Repeat several times, and the result is nice stacks of these ...
And since many of my favorite fabric designers make shirts, all these snowball corners are made from thrift-store shirts I've cut into usable fabric ...
I was planning to link this post to this week's Try It On Tuesday at a favorite blog - Jo's Country Junction. Looks like she's not doing link-ups yet today - but there's an interesting post there anyway! (Side note - there's often a Tuesday giveaway at Jo's Country Junction, and it's always fun to see what Jo and others are trying on Tuesdays!)
I am linking this post to this week's Fabric Tuesday at Quilt Story's blog.


No comments:
Post a Comment