This was a fun design challenge, and a special project to work on.
A couple of months ago, Joanna sent me a message, asking if I could work on a quilt for her family. A dear relative of theirs was cleaning out his closet, and had given them a stack of shirts. Not being able to use the shirts, but not wanting to give them away, Joanna had the inspiration to ask about turning the shirts into a quilt.
A nautical theme was chosen, which is a perfect fit - many of the shirts were nautical prints and colors, and this relative loves all things nautical.
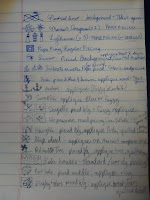
I started out with these stacks of shirts, and a list of nautical quilt-block ideas ...
After some design work, I sent Joanna this drawing as the plan ...
And then, there was a lot of cutting and measuring and figuring and stitching and quilting!
I may have mentioned before on this blog that my favorite "quilt fabric designers" involve shirt fabrics! I've made quite a few quilts out of men's dress shirts (see the label in my blog sidebar "Dress Shirt Quilts"), and this one was a lot of fun.
Here are a few close-ups, in various stages of assembly ...
Mariner's compasses, and life preservers ...
Lighthouses, of course! Just pieced, before quilting in the details ...
Nautical knot and rowboat ...
Ship's wheel getting some "wood grain" quilting ...
Sailboats!
Lake Houses and a sunset ...
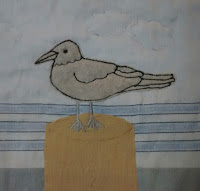
Sea gulls, made from a fleece shirt ...
With plenty of shirts (about 2 dozen), I made the borders and backing out of shirt fabric, too!
Here are borders in progress ...
The back includes big shirt pieces, small shirt pieces, and quite a few shirt tags!
Here's the entire quilt back.
I decided to use a quilt-as-you-go assembly method (like I used for this quilt and one of these ones), to give each block its own custom technique. This was helpful, since I had a variety of pieced and appliqué blocks that need a variety of quilting techniques. Each block (or border row) was put together: front, batting, and backing, and it was quilted all by itself before being put together with the other parts of the quilt.
One of the fun things about this quilt is that all of the fabric in it came from that stack of shirts, except for the tiny gray borders between each block and row, and the solid white fabric.
Even though I don't usually, I decided to take this quilt outside and lay it on a sheet for a whole-quilt photo. That seemed like the best place to get a full view of the quilt.

I know how much my family enjoys having quilts around to keep cozy, and I hope Joanna's family will get just as much enjoyment out of theirs!
One of my favorite quilt blogs, which is full of lots of quilt-y inspiration, has a weekly link party for finished quilt projects. I'll be linking this post to this week's Finish It Up Friday at CrazyMomQuilts, and I'm looking forward to seeing what other quilters have been working on and finishing up this week.
One of my favorite quilt blogs, which is full of lots of quilt-y inspiration, has a weekly link party for finished quilt projects. I'll be linking this post to this week's Finish It Up Friday at CrazyMomQuilts, and I'm looking forward to seeing what other quilters have been working on and finishing up this week.


That's a gorgeous quilt!!! The colors and the quilting are very well chosen. :) I do have a question though about your method of QAYG: when you say you did it row by row, do you leave an inch for connecting in layers later (for example you connected the front then the batting then the backing by hand?) I love QAYG and I'm always looking at various techniques for new ideas. I hope Joanna enjoyed her quilt, gorgeous work of art!
ReplyDeleteThanks for asking! My favorite (and only) method for joining Quilt-As-You-Go blocks is shown by the lady in this video ... https://m.youtube.com/watch?v=ji8BLS2rNHA ... This way there's no hand-stitching, and no need to separate the layers, and no loss of size once the blocks are trimmed to size for joining.
Delete